- Login to Admin panel.
- Click on ‘Scheduling‘ tab on the left hand side of admin panel screen.

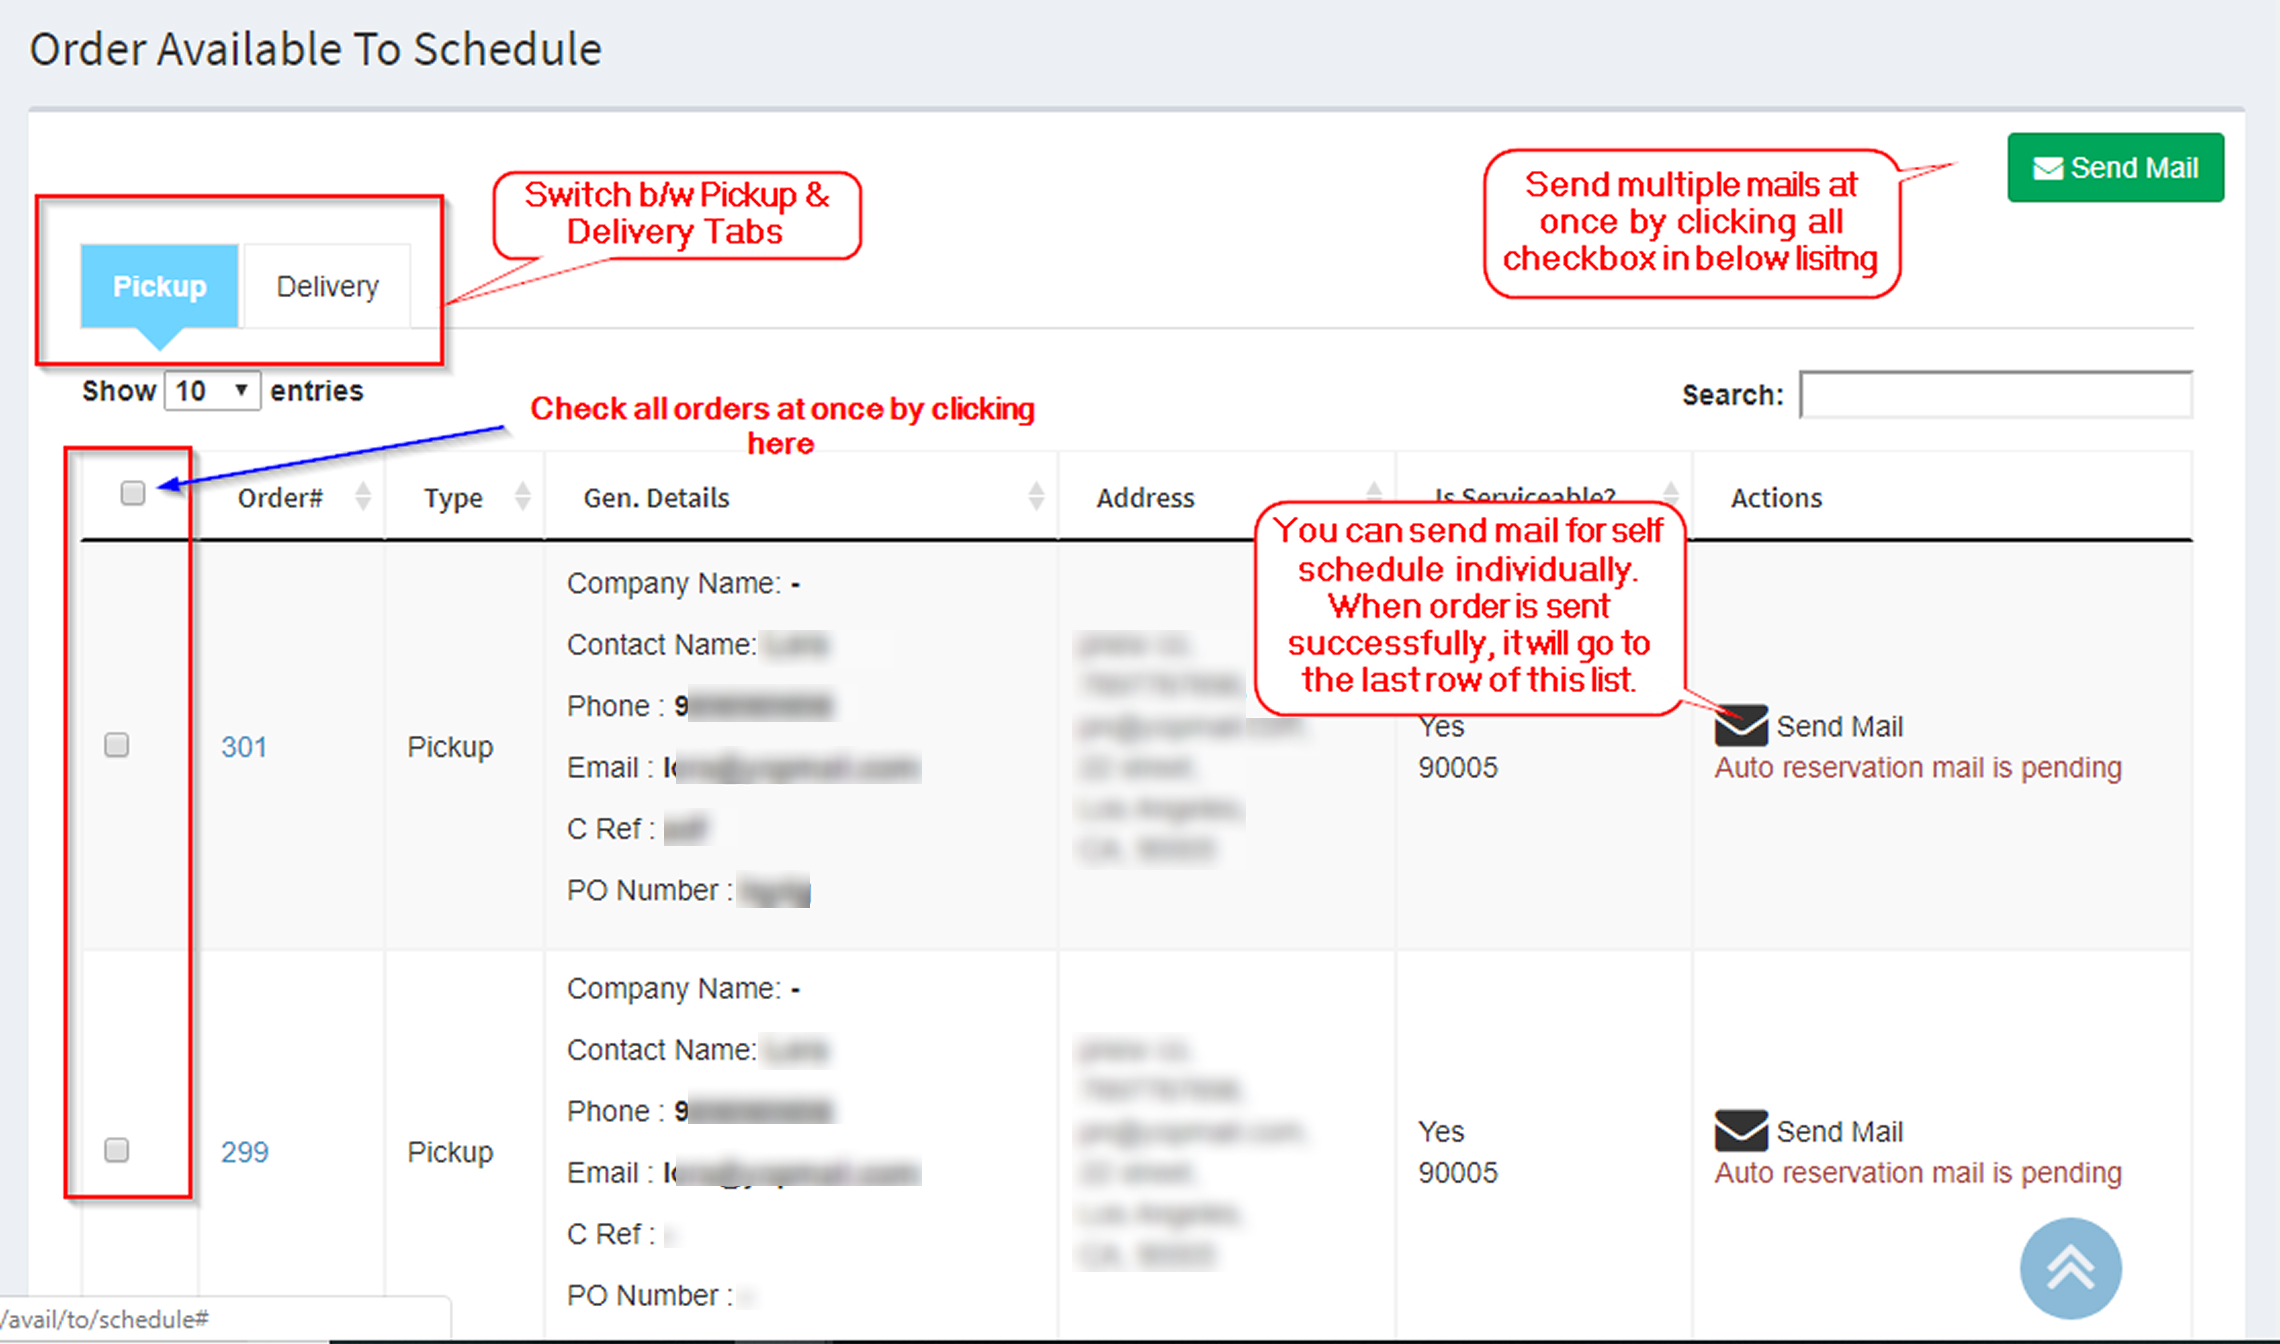
- Inside the Scheduling tab drop-down, click on ‘Order avail to schedule‘ and you will be redirected to a list of all the orders which are ready to be scheduled. Here you can switch between ‘Pickup‘ and ‘Delivery‘ tabs to schedule either pickup or delivery.
- There is an ‘Actions‘ column at the end of this list. Under this actions column, there is a button to ‘Send Mail‘ for auto scheduling. When you click on ‘Send Mail‘, an e-mail is sent to the e-mail ID mentioned in ‘Address‘ column of this list.
- If an e-mail is already sent then there is also an option to ‘Re-send mail‘. This action will send another e-mail for scheduling to the same e-mail address.
- If the zip code is not present on system, then it will ask to ‘Add zipcode to territory‘ under the ‘Actions‘ column.
- If you have to send scheduling e-mails for multiple orders at once, then you can select the desired orders and click on the ‘Send Mail‘ button located at top right hand corner of the page.
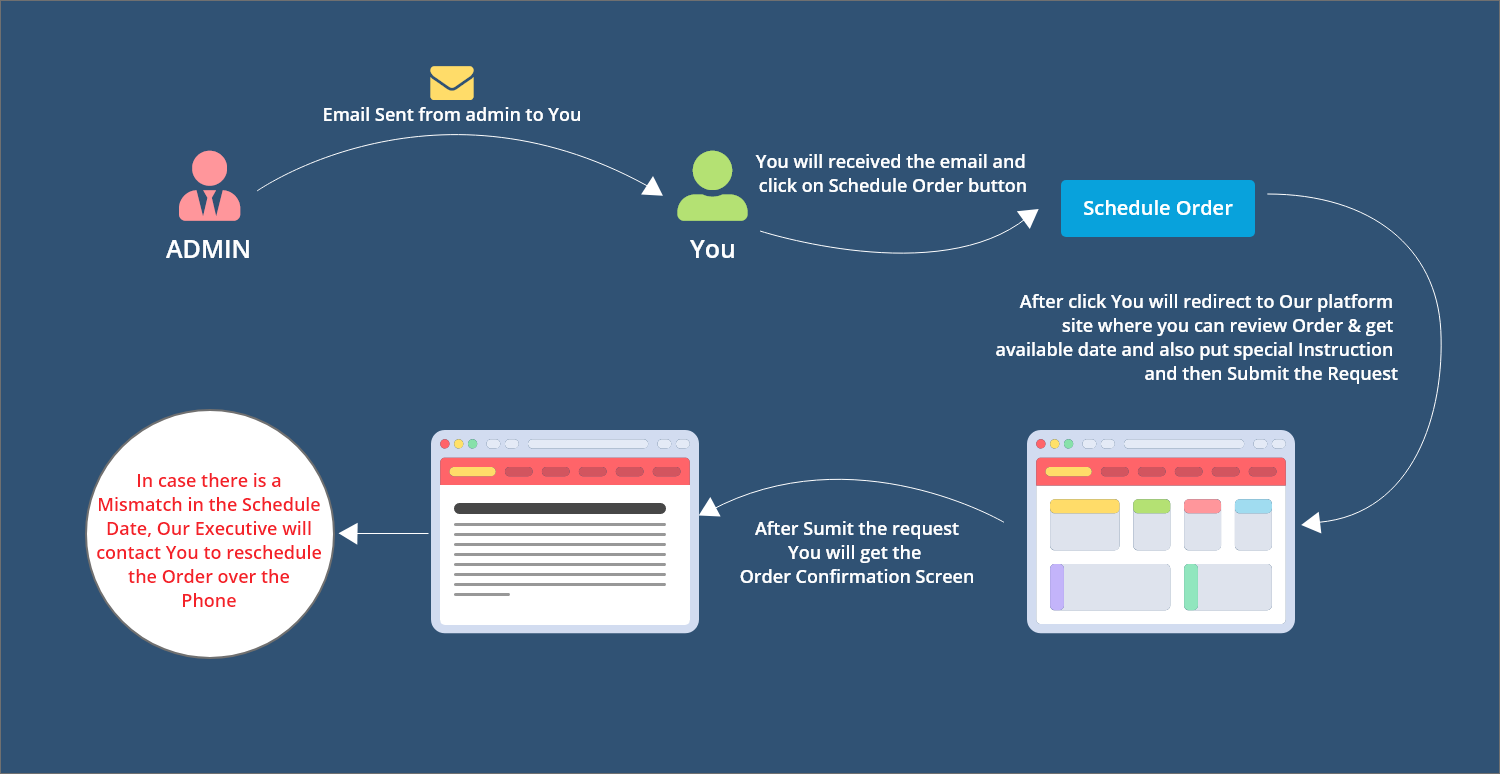
- After the e-mail is sent from admin panel, it is received by the recipient. Inside the e-mail body, there is a button saying ‘Click Here To Schedule‘.
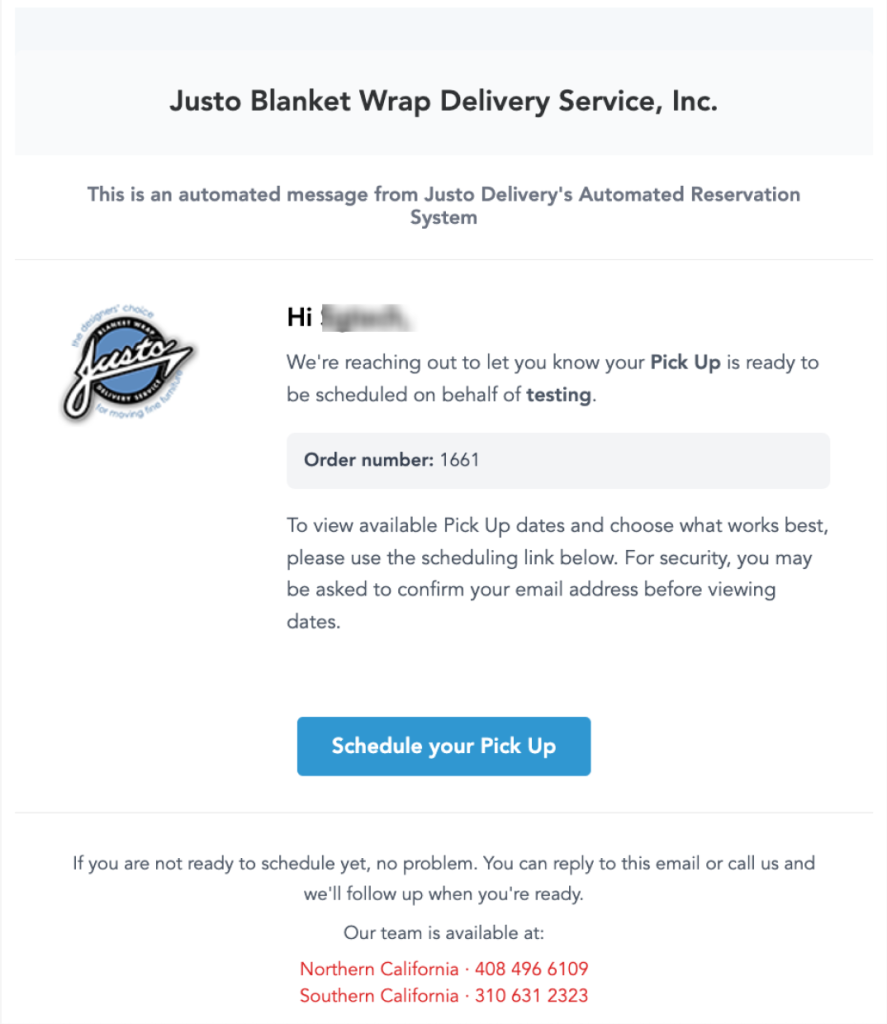
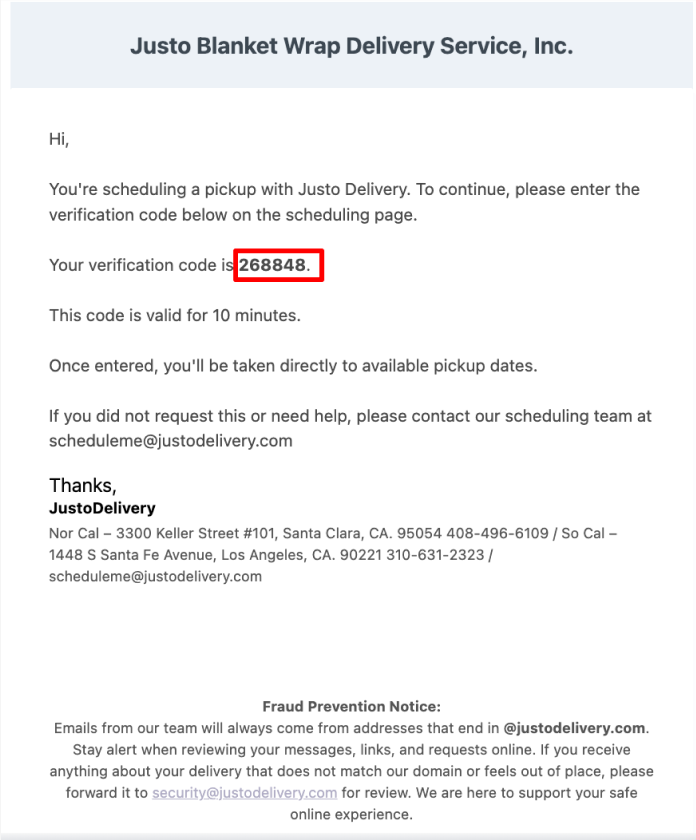
- You will receive an email from Justo Blanket Wrap Delivery Service, Inc. informing you that your pickup is ready to be scheduled.
- The email includes your Order Number and pickup information.
- Click the “Schedule your Pick Up” button to start the scheduling process.
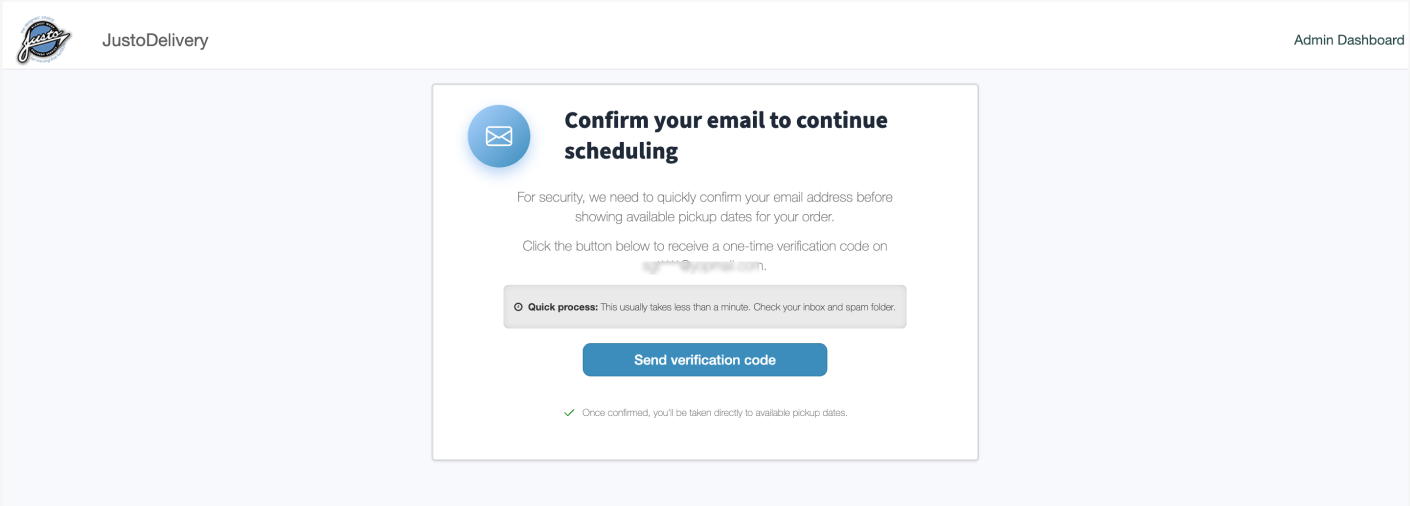
- Open your email inbox and find the message from Justo Delivery.
- The email will contain a 6-digit verification code.
- Copy the verification code from the email.
- Please note that the code is valid for 10 minutes only.
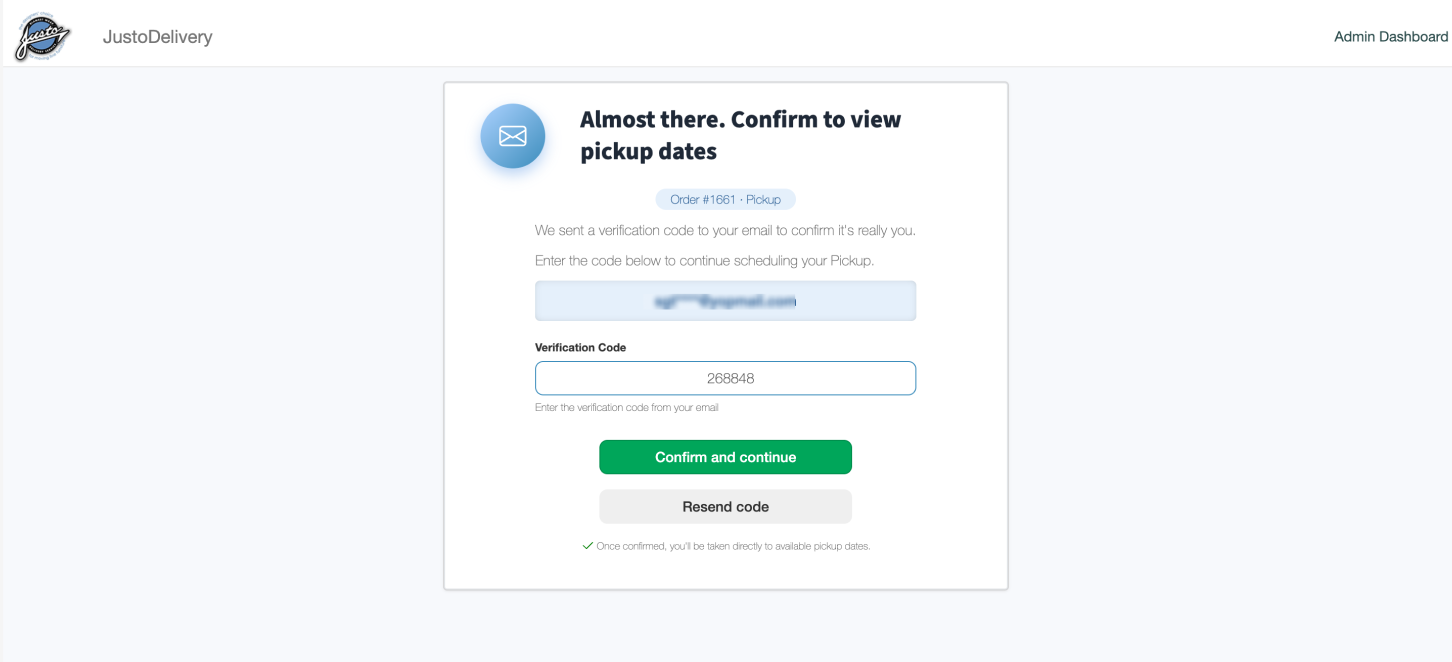
- Return to the verification page in your browser.
- Enter the 6-digit verification code in the Verification Code field.
- Click the “Confirm and continue” button to proceed.
- If you did not receive the code, click “Resend code” to request a new one.
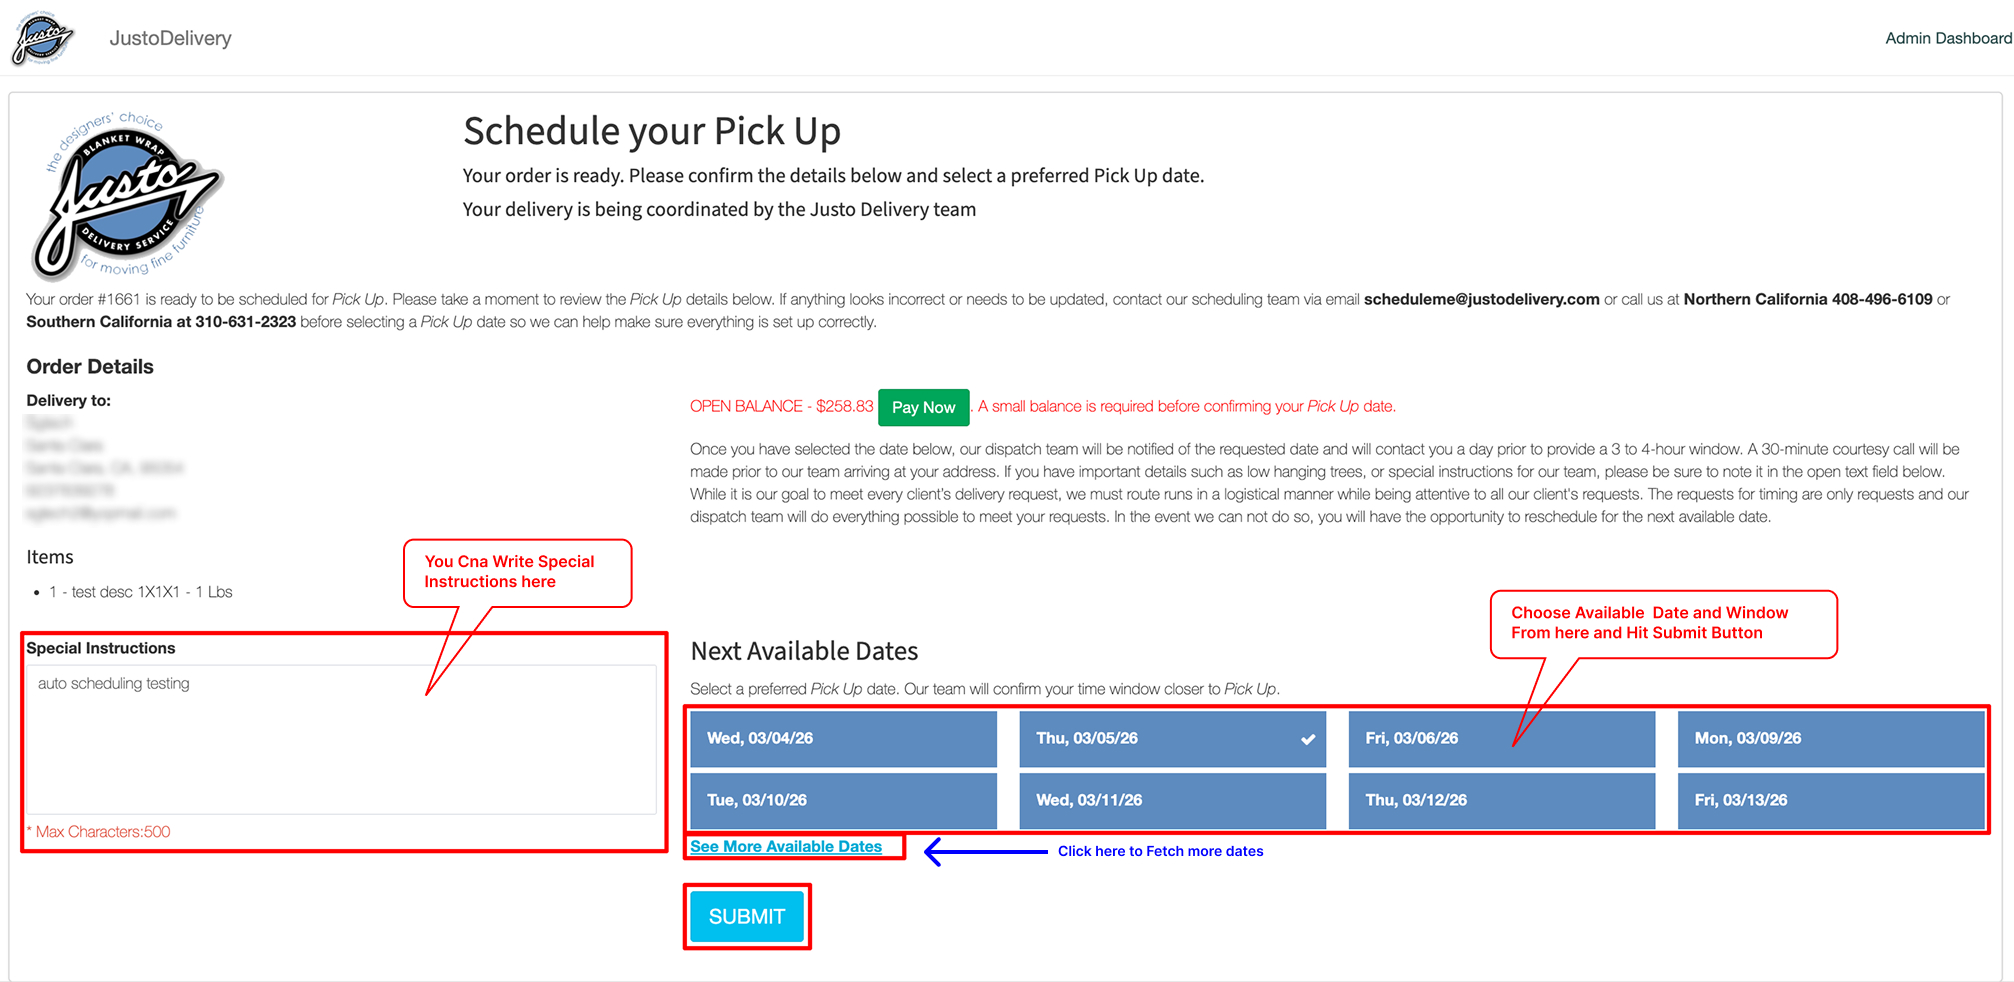
- When clicked on this button, customer will be redirected to our system platform where he/she can choose a desirable date and time window for scheduling and click on submit button. Customer can also add Special Instruction which is an optional field.
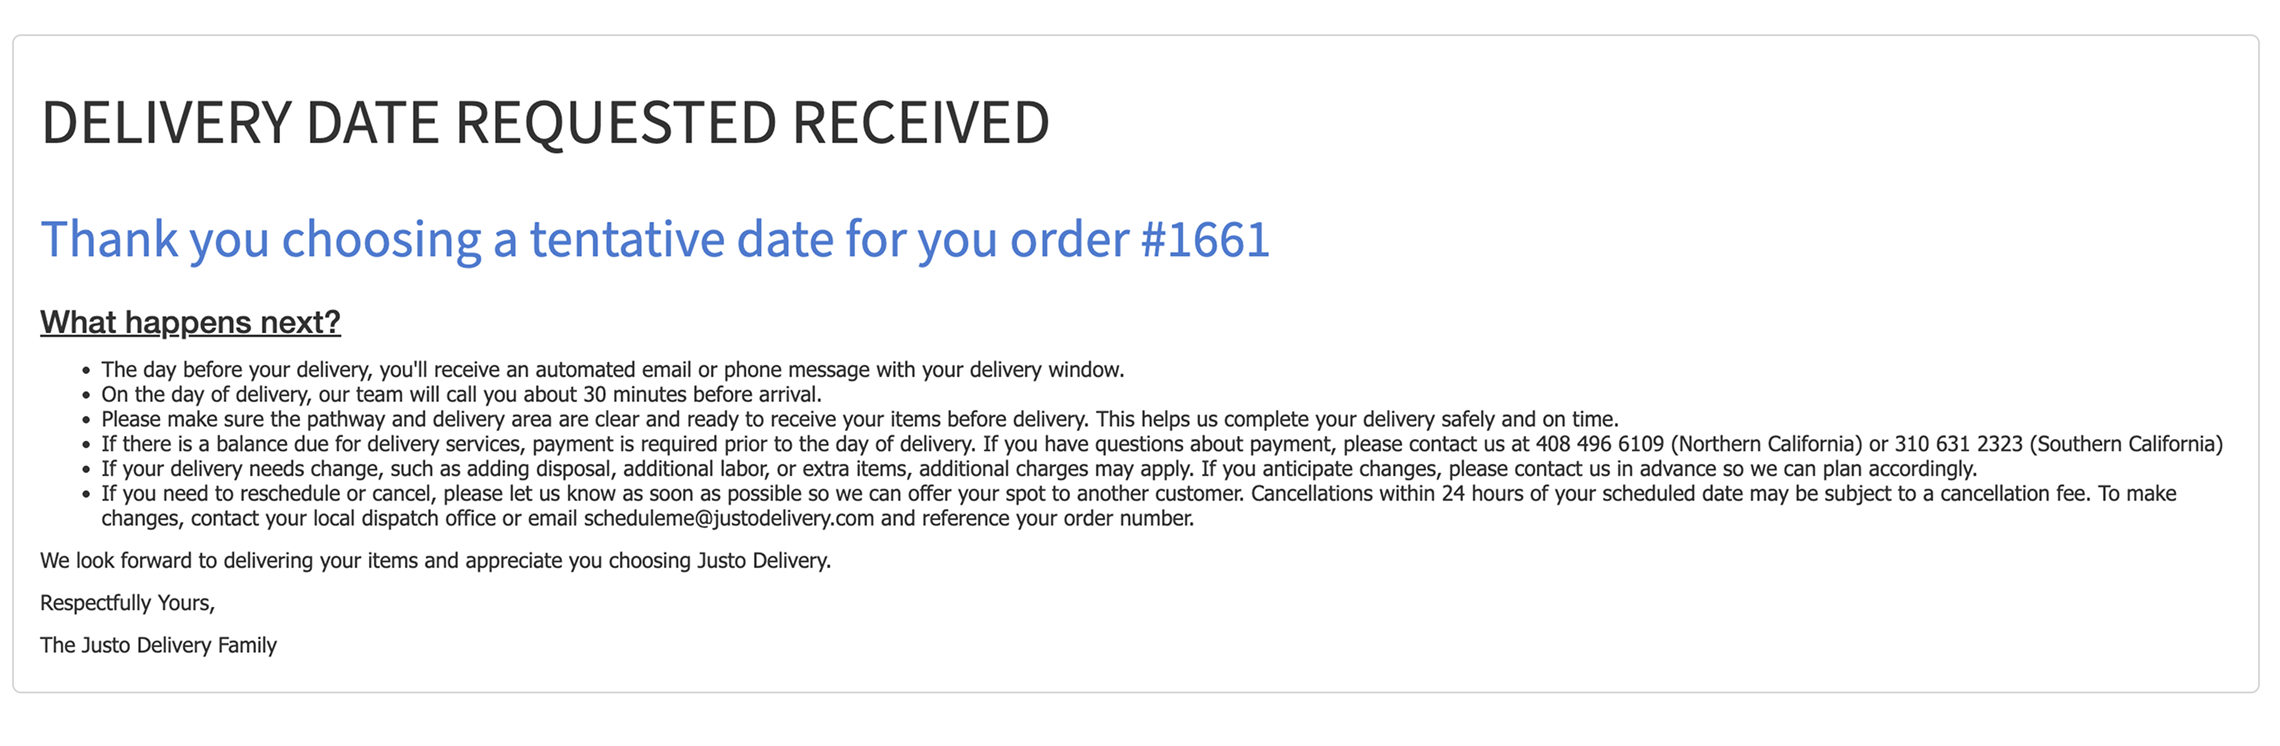
- Customer will see a confirmation screen on successful scheduling.
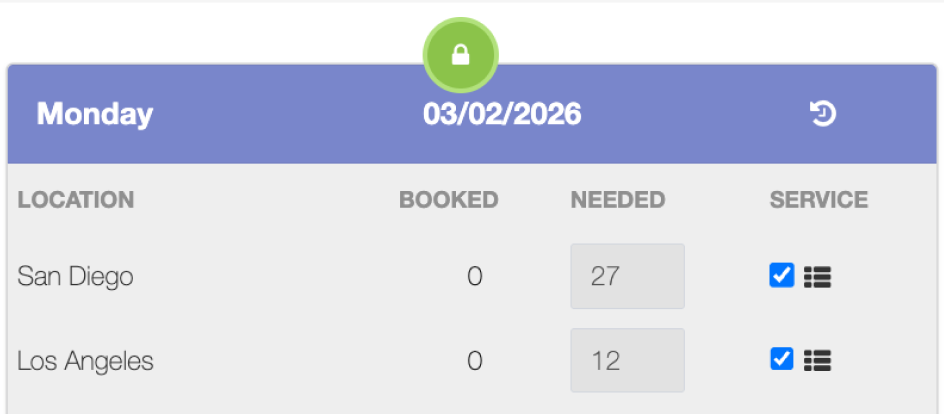
- Go back to admin panel, under Scheduling > Volume Settings: You can check the number of booked orders out of needed orders for particular date and territory. You can manually edit these numbers by clicking on ‘lock‘ icon, which will enable you to edit these fields and after editing these fields, you have to again click on ‘lock‘ icon to save the changes.
- After successful scheduling, admin can view the order inside admin panel. Go to ‘Scheduling‘ drop-down, click on ‘Order responded‘ and a list of orders that have been responded to will be displayed on that page. Click on the ‘Order#‘ and a new page with all the order details will be opened.
- Here you can check the ‘Status‘ of this order And ‘Scheduled Pickup Date & Window‘.
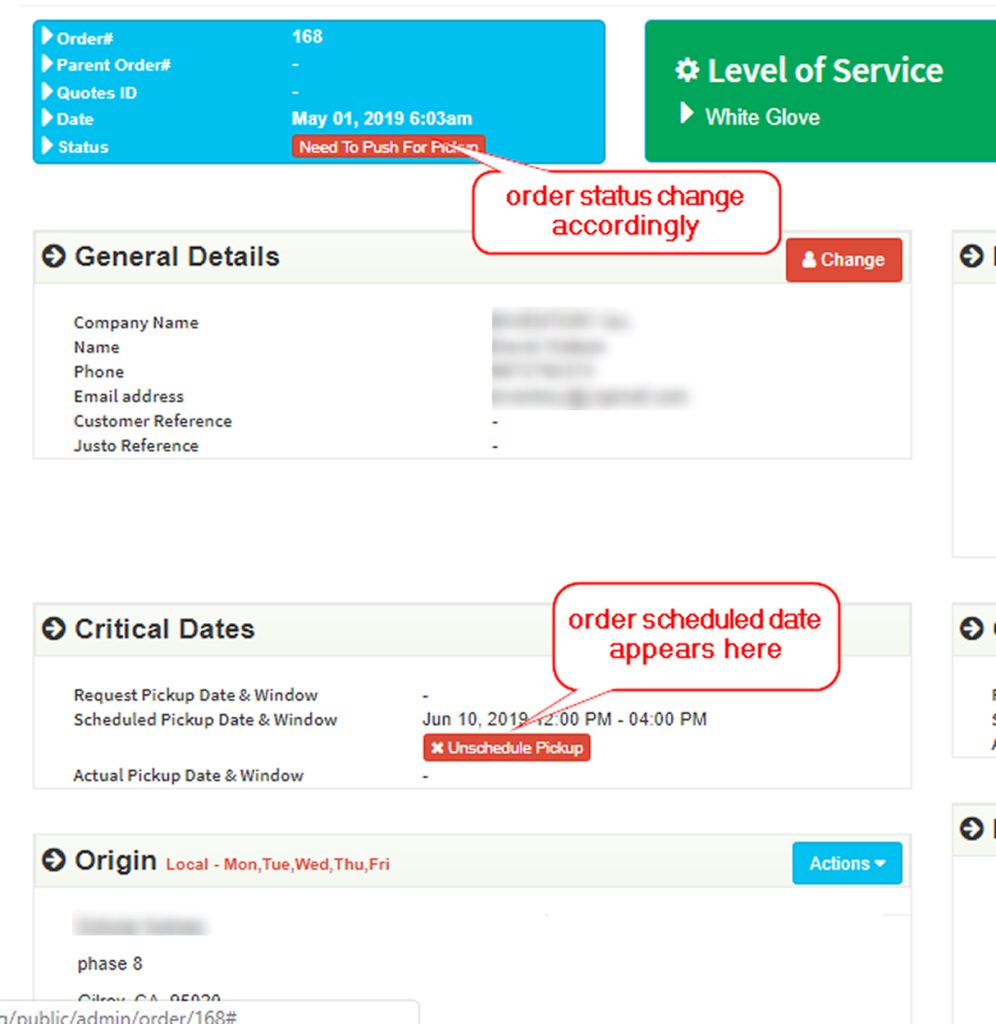
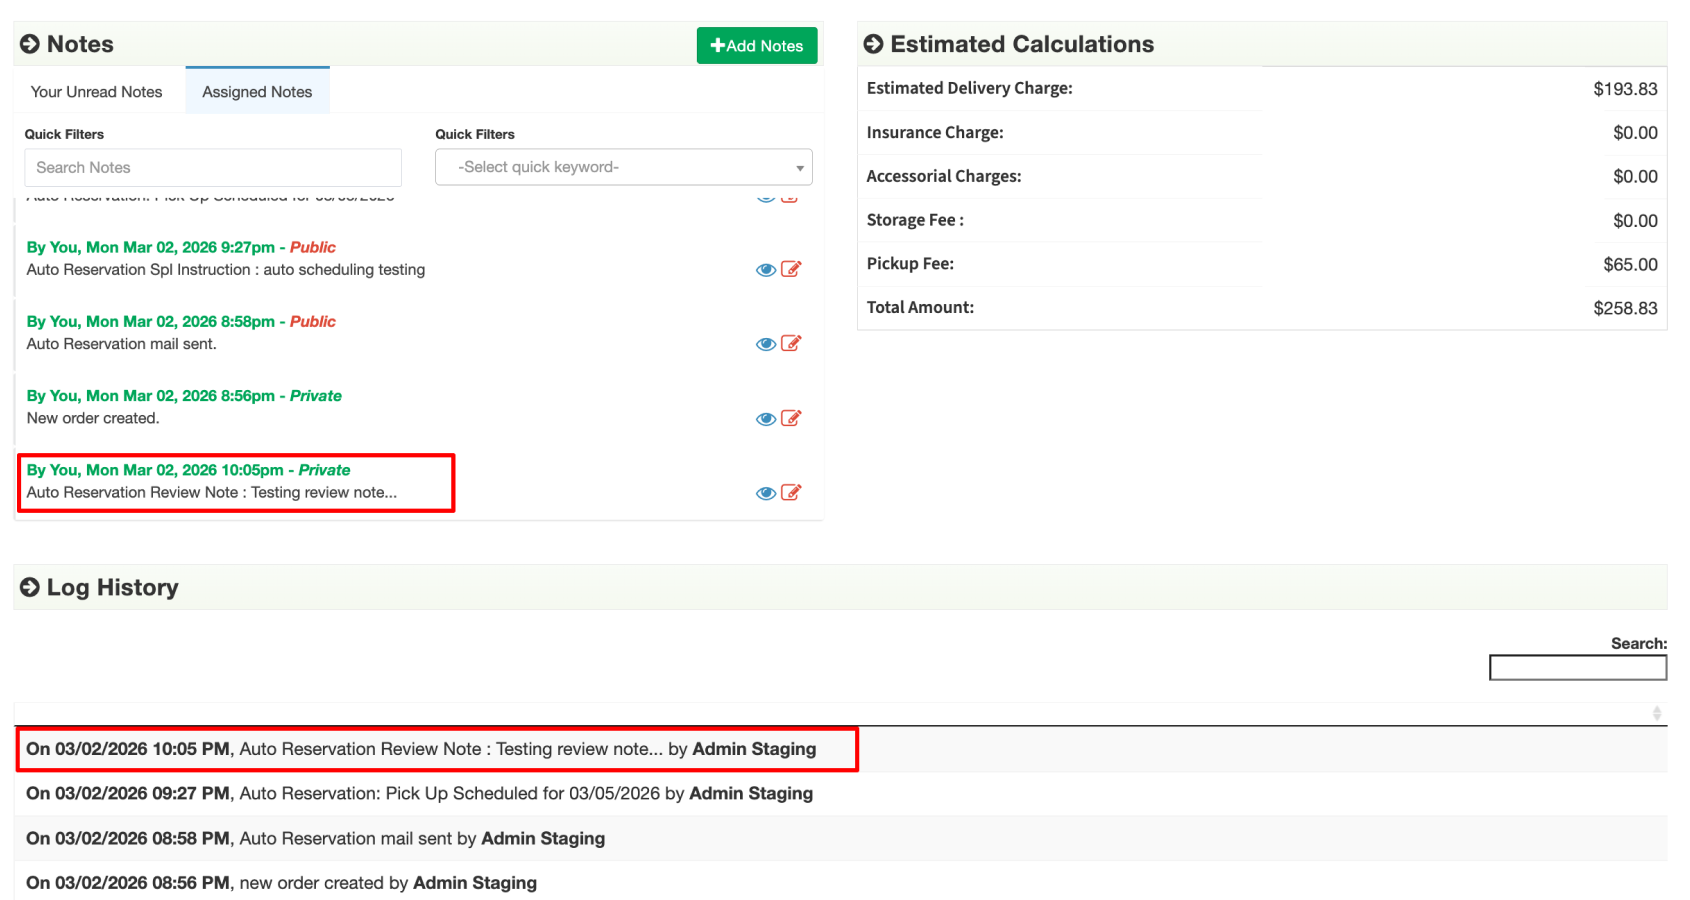
- You can also view other order details such as ‘Special instructions’ added to ‘order notes‘ section. Also all the ‘Auto reservations’ can be checked under order notes.
- We also maintain a ‘log history‘ here which contains all the actions performed related to this order.

- After successful scheduling from customer’s end, the count will increase by one and displayed next to Scheduling as well as Order Responded Tab.

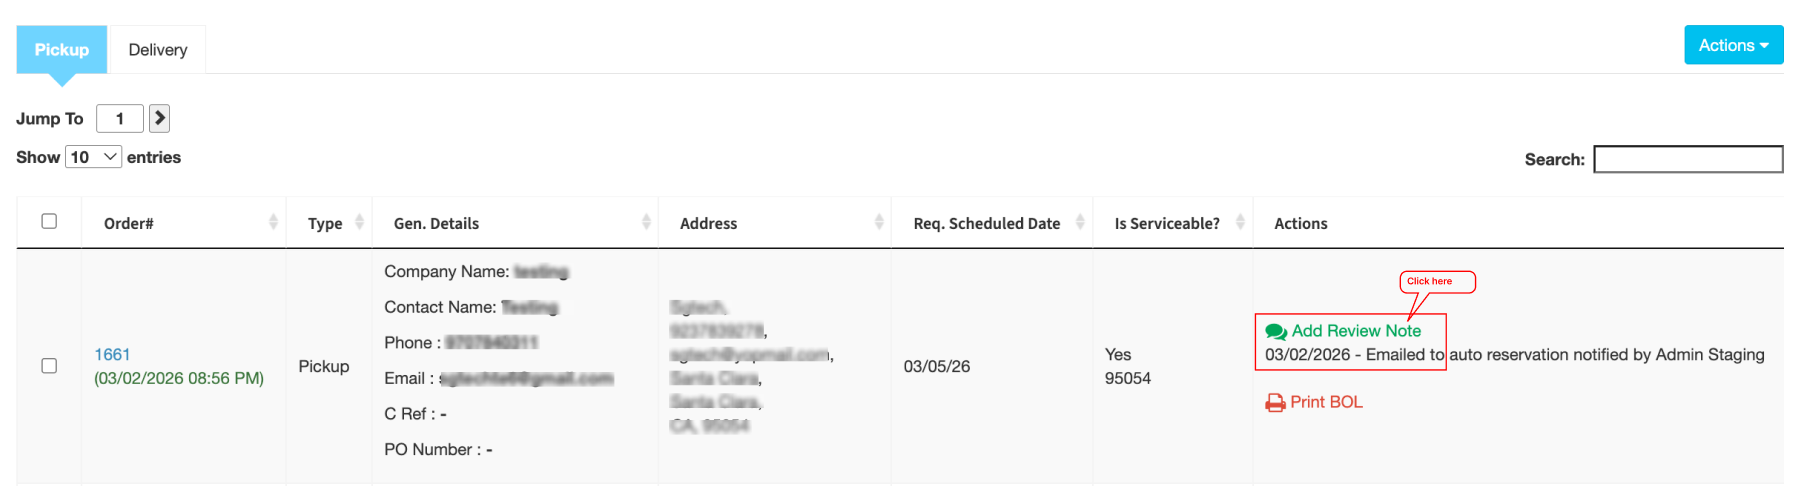
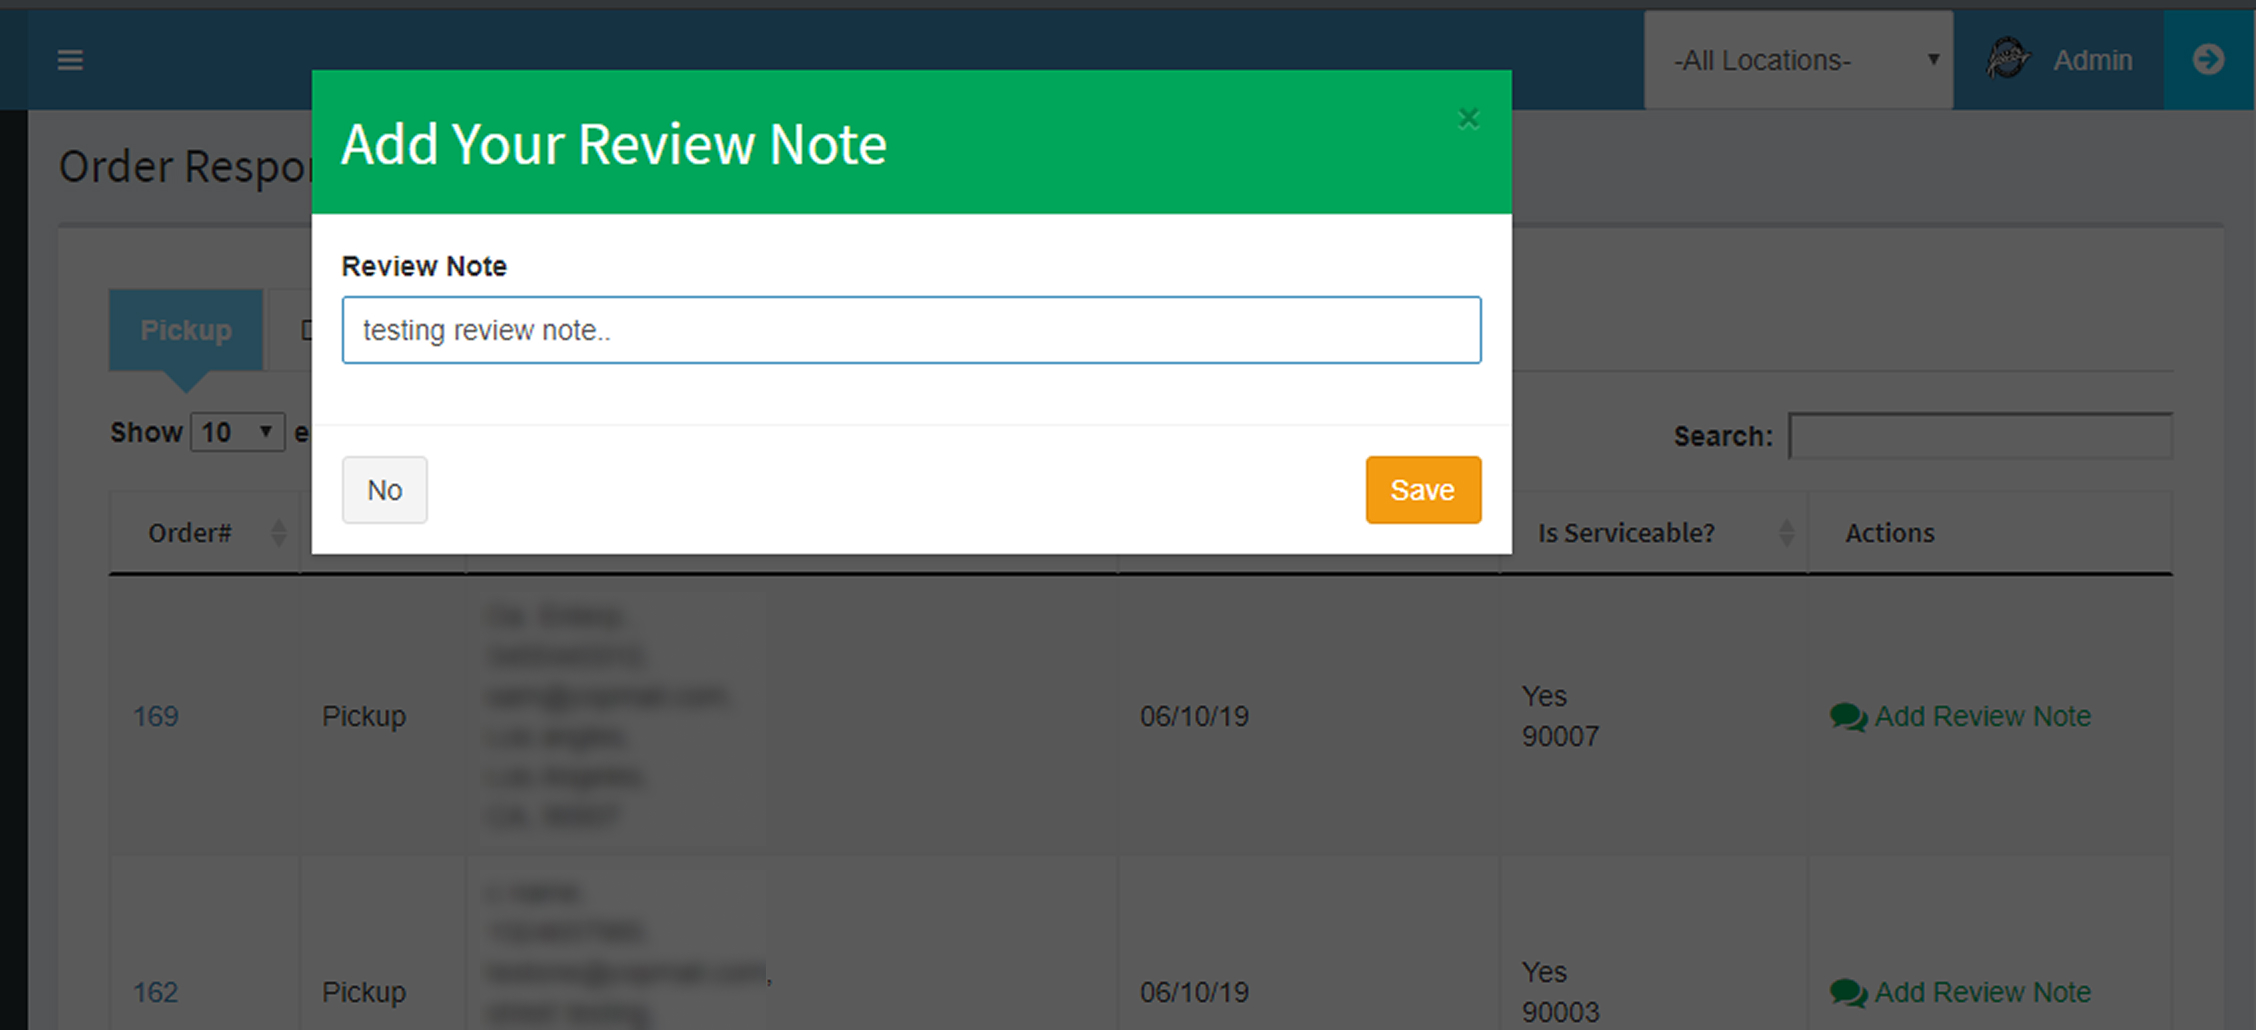
- Inside the ‘Order Responded‘ list, you can also add ‘Review notes‘ for any of the responded orders which will reflect on ‘order notes‘ inside the order detail page.
- After ‘review notes‘ are added to any responded order, the order disappears from ‘Order Responded‘ and appears on ‘Order Reviewed’ under the ‘Scheduling’ tab drop-down on admin panel.
- NOTE: If anybody reviews any of the ‘responded orders‘ it will be removed from there and placed under ‘Order responded‘ tab for everyone.
- Under Scheduling > Order Reviewed: You can check all the orders that have been reviewed by you.
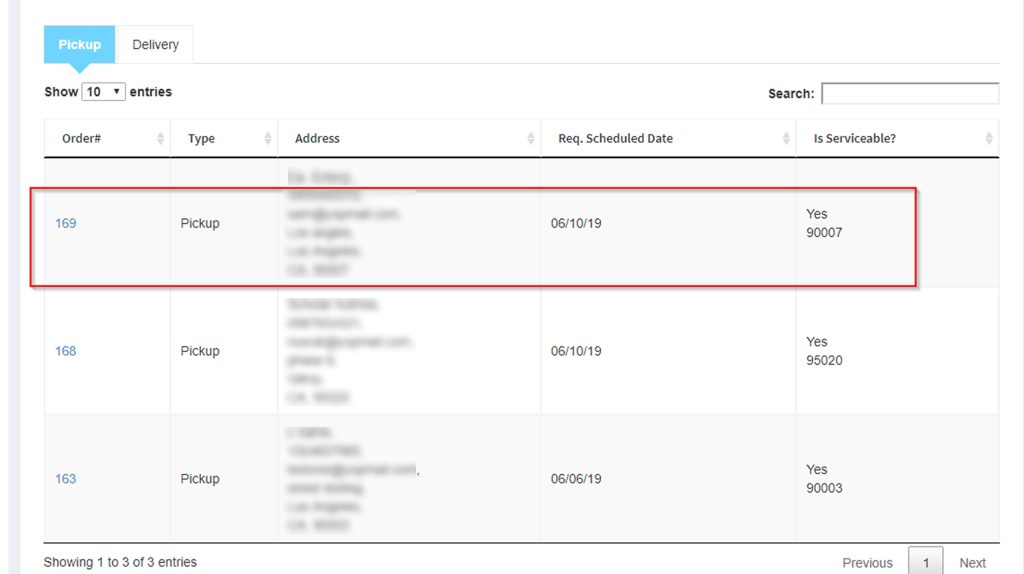
- Under the scheduling tab, there is a sub-tab called ‘Order not in service area‘ which contains all the orders having zip codes those which are not serviceable.

- Admin can add those zip codes to appropriate territory.
- NOTE: After successfully adding zip code to territory, it will disappear from this list and go to ‘Order avail to schedule’ list.
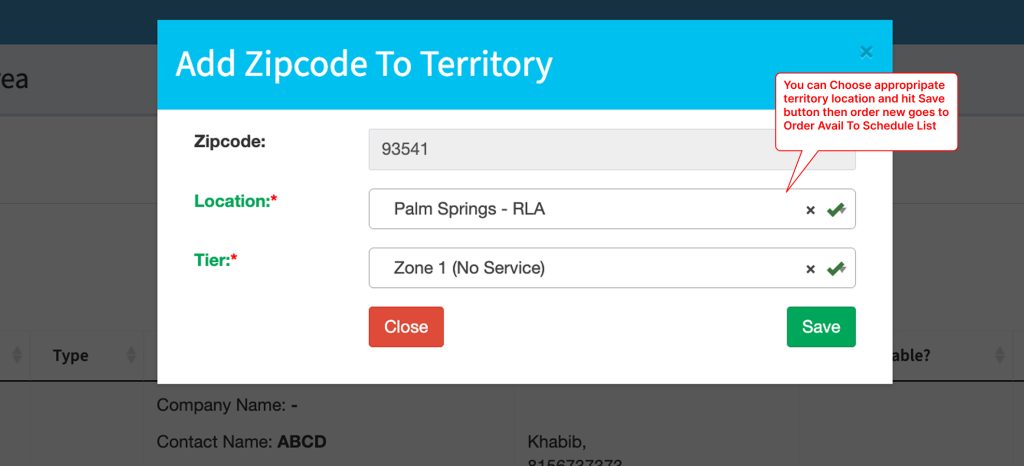
Fig 12.2